Lighten Up Your Smile: A StepbyStep Guide on How to Whiten Teeth on Lightroom

A bright and radiant smile can do wonders for your overall appearance and boost your confidence levels. However, teeth discoloration can be a common issue that can detract from the charm of your smile. While traditional whitening treatments can be expensive and time-consuming, there are ways to enhance your pearly whites without breaking the bank. In this step-by-step guide, we’ll explore how you can use Adobe Lightroom to whiten teeth and give your photos a professional touch. Adobe Lightroom is a powerful photo editing tool that lets you customize your images to your heart’s content. With its advanced features, you can adjust exposure, contrast, saturation, and other aspects of your photos to achieve the desired results. Teeth whitening is one of the many editing possibilities that Lightroom offers. Whether you’re a professional photographer or an amateur snapper, this guide will walk you through the process of whitening teeth in Lightroom and help you achieve stunning results. So, let’s get started and brighten up those smiles!
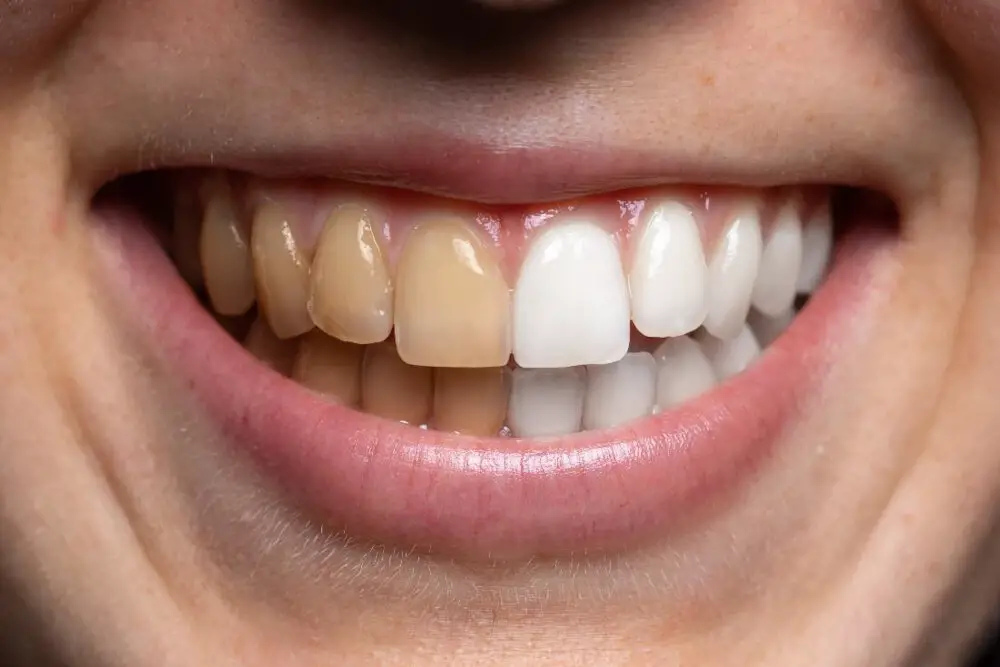
Having white teeth is not only aesthetically pleasing but also important for one’s confidence and overall health. Stained or discolored teeth can make a person feel self-conscious and affect their interactions with others. Additionally, good oral hygiene, including regular teeth cleaning, is crucial for preventing gum disease and tooth decay. Whitening teeth can also help remove surface stains caused by consuming foods and drinks such as coffee, tea, and wine. Overall, having a bright smile can boost one’s self-esteem and contribute to a healthier mouth.
Lightroom is a powerful photo editing software designed for professional photographers and amateurs alike. It provides a range of features that allow users to enhance the quality and appearance of their photos, including teeth whitening. With Lightroom, you can easily whiten teeth and brighten smiles in just a few clicks. The teeth whitening tool works by adjusting the exposure and saturation of the teeth, resulting in a brighter and whiter smile. This feature can be particularly useful for portrait photographers and those working in the beauty industry who want to enhance the appearance of their subjects. Overall, Lightroom is a versatile and user-friendly software for enhancing the visual appeal of photos, including teeth whitening.
Step 1: Importing the Image to Lightroom

Importing the image to Lightroom is the first step towards creating a brighter smile. To do this, you need to open Lightroom and click on the Import button on the bottom left corner of the screen. This will bring up a window where you can select the image you want to import. Once you’ve selected the image, you can choose where you want to store the file and how you want to organize it. You can also apply metadata to the image, such as a title or keywords, to make it easier to find later on. When importing an image to Lightroom for teeth whitening, it is important to make sure that the image is of good quality. This means that it should be in focus, with good lighting and color balance. If the image is too dark or too bright, you can adjust the exposure and tone settings in Lightroom to make it look better. You can also use the crop tool to remove any unwanted parts of the image, such as distracting backgrounds or other people. Once you have imported the image and made any necessary adjustments, you are ready to move on to the next step in the teeth whitening process.
Importing an image to Lightroom is an easy process that can be done in a few simple steps. First, open Lightroom and click on the \Import\ button located in the bottom-left corner of the screen. Then, select the source from which you want to import the image and choose the image you want to import. You can also choose to copy the image to a new location or add it to an existing folder. Once you have selected the image, you can choose to apply any preset settings or adjust the settings manually before importing it. After clicking the \Import\ button, the image will be added to your Lightroom library, and you can begin editing it to whiten teeth or make any other desired adjustments.
Working on a RAW file is crucial for achieving the best possible results in photo editing. RAW files contain all the information captured by the camera’s sensor, including color and exposure data, which provides greater flexibility and control over the final image. Unlike JPEG files, which are compressed and discard some of this information, RAW files offer a wider dynamic range and the ability to adjust white balance and exposure without loss of quality. Therefore, when it comes to teeth whitening in Lightroom, working on a RAW file allows for more accurate adjustments and better preservation of details, resulting in a natural-looking and brighter smile.
Step 2: Basic Adjustments

In Step 2: Basic Adjustments, we start by adjusting the exposure of the photo. This is an essential step to ensure that the teeth are not overly bright or dim, and the overall image looks balanced. We can either increase or decrease the exposure depending on the original photo’s lighting, but we must be careful not to overdo it. We should aim for a natural-looking result, and a slight adjustment is often enough. Additionally, we can adjust the contrast, highlights, and shadows to further enhance the photo’s overall look. By doing so, we can emphasize the teeth and make them stand out even more. Another crucial aspect of Step 2 is adjusting the white balance. This is especially important when dealing with photos that have a yellow or warm tone, as it can affect the teeth’s color. We can adjust the temperature and tint sliders to achieve a more natural-looking white balance. This step can significantly impact the overall look of the photo and make the teeth appear whiter and brighter. Finally, we can make minor adjustments to the saturation and vibrance to enhance the colors of the photo, making the teeth stand out even more. Overall, Step 2 is an essential part of the teeth whitening process, and proper adjustments can make a significant difference in the final result.
In Lightroom, adjusting the exposure, contrast, highlights, and shadows can greatly enhance the appearance of your photographs. To adjust the exposure, use the exposure slider to brighten or darken the overall image. If you want to make certain areas of the image stand out, adjust the contrast using the contrast slider. Use the highlights slider to recover any details that may have been lost in bright areas of the image, while the shadows slider can be used to add detail to darker areas. Experiment with these adjustments to achieve the desired look for your photograph.
Adjustments in teeth whitening are crucial in achieving a perfect and natural-looking smile. Teeth whitening is not just about making your teeth brighter, but it also involves enhancing the overall appearance of your teeth. The adjustments in teeth whitening, such as exposure, contrast, saturation, and hue, can help to improve the brightness, color, and tone of your teeth. Moreover, these adjustments can also correct any discoloration or staining caused by various factors like aging, smoking, coffee or tea consumption, and poor oral hygiene. Therefore, by making the necessary adjustments in teeth whitening, you can achieve a healthy and radiant smile that boosts your confidence and self-esteem.
Step 3: Selective Adjustments
Selective adjustments are an essential step in the process of whitening teeth on Lightroom. This step involves making targeted adjustments to specific areas of the image rather than applying a blanket effect to the entire image. By doing so, you can achieve a more natural and realistic look, and avoid over-whitening teeth to the point of looking unnatural. Selective adjustments can be made using the adjustment brush tool or the graduated filter tool, allowing you to adjust the exposure, clarity, saturation, and other settings in specific areas of the image. When making selective adjustments, it’s important to pay attention to the overall balance of the image. For example, if you brighten the teeth too much, you may need to adjust the exposure or contrast in other areas of the image to maintain the overall balance. Additionally, you may need to adjust the brush size and feathering to ensure that the adjustments blend seamlessly with the rest of the image. With careful attention to detail and a bit of practice, you can create beautiful, natural-looking images that showcase your subject’s bright, white smile.
To use the adjustment brush on Lightroom to selectively whiten teeth, begin by selecting the adjustment brush tool from the toolbar or by pressing \K\ on your keyboard. Adjust the size of the brush, making it small enough to work with the teeth. Next, adjust the exposure to about +1.00 and the saturation to -100. Begin painting over the teeth, making sure to stay within the lines of each tooth. Zoom in to ensure you are being precise. Once all the teeth have been painted, adjust the exposure and saturation sliders to your liking. You can also adjust the clarity slider to bring out the details in the teeth. Remember to keep the edits subtle and natural-looking. Finally, save your edited photo and show off your brighter, whiter smile.
When it comes to whitening teeth in Lightroom, using a soft brush is crucial for achieving a natural-looking result. A soft brush ensures that the teeth are not over-whitened, which can make them appear fake and unnatural. Adjusting the flow and density of the brush also plays a critical role in achieving a subtle and realistic look. Increasing the flow and density too much can result in harsh and obvious edits, while decreasing it too much may not offer enough whitening effect. Therefore, finding the right balance between the two is essential for creating a flawless and beautiful smile. Overall, using a soft brush and adjusting the flow and density are indispensable techniques for mastering the art of teeth whitening in Lightroom.
Step 4: Finishing Touches
Step 4: Finishing Touches is the final step in the process of whitening teeth on Lightroom. This step involves making some final adjustments to the image to ensure it looks natural and realistic. One of the most important things to do in this step is to check the overall color balance of the image. If the image looks too yellow or blue, adjustments can be made to the white balance to correct this. Another important aspect of this step is to ensure that the teeth do not look too bright or unnatural. This can be done by adjusting the saturation and luminance of the teeth, as well as the surrounding areas. By making these final tweaks, the image will look polished and professional. In addition to adjusting the color balance and brightness of the teeth, there are a few other finishing touches that can be added to enhance the overall look of the image. One of these is to add a slight vignette around the edges of the image. This can help to draw the viewer’s eye towards the center of the image, where the teeth are located. Another technique that can be used is to add a subtle blur to the background of the image. This can help to make the teeth stand out even more, and create a more professional look. Overall, the finishing touches step is crucial in ensuring that the final image looks polished and natural, and is sure to impress anyone who sees it.
Using the spot removal tool in Lightroom is a simple and effective way to remove any remaining stains on teeth. First, select the spot removal tool from the toolbar and adjust the size of the brush to match the size of the stain. Next, click on the stain to create a sample point and then click on the area of the teeth that you want to replace the stain with. Lightroom will automatically blend the colors and textures of the chosen area to create a natural-looking result. To ensure a seamless finish, you can adjust the opacity and feathering of the spot removal tool as needed. With a few simple clicks, you can brighten up your smile and achieve a picture-perfect look.
Adjusting the saturation and vibrance of an image is an effective way to enhance its overall appeal. Saturation refers to the intensity of colors in an image, while vibrance affects the saturation of less-saturated colors. To adjust these settings in Lightroom, open the Develop module and navigate to the Basic panel. From there, you can use the Saturation and Vibrance sliders to increase or decrease the intensity of colors in the image. It’s important to use these sliders judiciously, as over-saturation can lead to an artificial-looking image. By adjusting the saturation and vibrance, you can bring out the natural beauty of your image and make it more visually striking.
The teeth whitening process on Lightroom involves a series of simple steps that can transform your photographs from dull to dazzling. Firstly, you need to select the brush tool from the toolbar and choose the correct brush size. Secondly, adjust the settings of the brush tool to the desired level of exposure and saturation. Thirdly, apply the brush tool over the teeth that need to be whitened. Fourthly, refine the edges of the teeth by using the adjustment brush tool. Lastly, adjust the overall exposure and saturation of the photo to ensure that the teeth blend in with the rest of the image. With these steps, you can achieve a natural-looking, brighter smile that will enhance the overall appeal of your photographs.
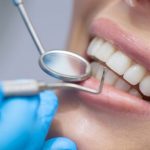
When it comes to teeth whitening, it’s important to remember that moderation is key. While a bright, white smile is often desired, overwhitening can actually be detrimental to your oral health. Excessive use of whitening products can cause sensitivity, enamel erosion, and even damage to the roots of your teeth. Therefore, it’s crucial to practice caution and follow instructions carefully when using whitening products. Consulting with a dental professional before starting any whitening regimen is also recommended to ensure that it’s safe and effective for your individual needs. A healthy balance of proper dental hygiene and responsible teeth whitening can lead to a beautiful, healthy smile.
Aside from using Lightroom to whiten teeth in photos, there are also a number of things you can do to achieve a bright, natural-looking smile in real life. First and foremost, regular brushing and flossing are essential to maintaining healthy teeth and gums. Additionally, avoiding foods and drinks that can stain your teeth, such as coffee, wine, and tobacco products, can go a long way in keeping your smile white. Consider using whitening toothpaste or strips, but be sure to follow the instructions carefully to avoid damaging your enamel. Lastly, scheduling routine dental cleanings and checkups with your dentist can help catch any potential issues early on and keep your teeth looking their best.
Conclusion
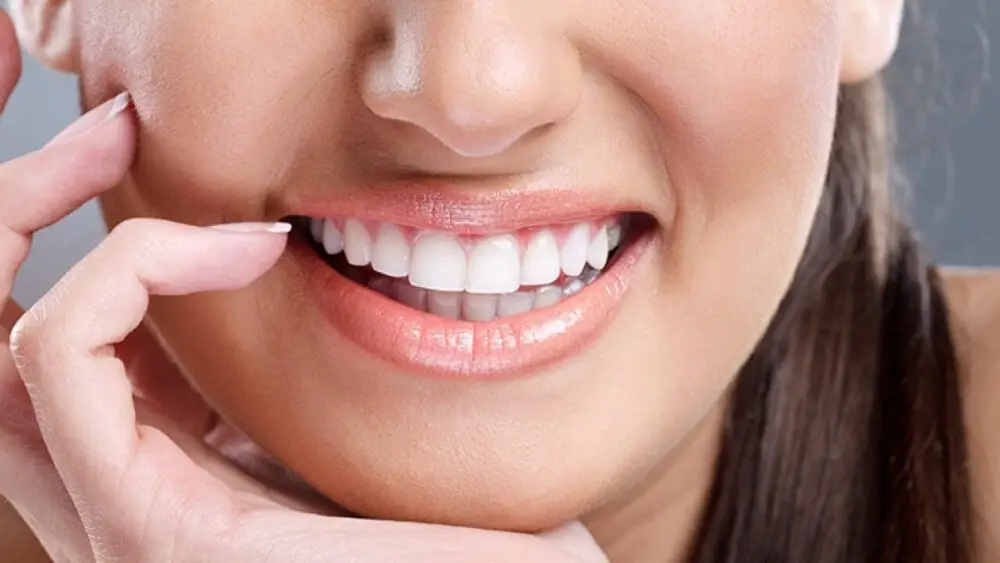
In conclusion, achieving a brighter and more radiant smile is now possible with the help of Lightroom. By following the step-by-step guide on how to whiten teeth, you can enhance the overall quality of your photographs and boost your confidence in flashing your pearly whites. With just a few tweaks and adjustments, you can transform dull and yellowish teeth into a sparkling and captivating feature in your images. So, don’t shy away from showing off your smile and let Lightroom help you achieve the perfect, picture-perfect grin!
Related posts:
 Lighten Up Your Smile: A StepbyStep Guide on How to Whiten Teeth in Lightroom
 Whiten Your Teeth Instantly with Photoshop: A StepbyStep Guide
 Snow Teeth Whitening: A StepbyStep Guide on How to Achieve a Brighter Smile
 How to Brighten Your Smile: The Ultimate Guide to Using a Teeth Whitening Pen
 How Long Does It Take to Whiten Teeth? A Comprehensive Guide to Achieving a Brighter Smile
 Get a Brighter Smile: Discover How to Whiten Bonded Teeth in 5 Simple Steps
 Master the Art of Drawing Teeth: StepbyStep Guide for Beginners
How Often Should You Whiten Your Teeth? A Dentist’s Recommended Guide
Master the Art of Drawing Teeth: StepbyStep Guide for Beginners
How Often Should You Whiten Your Teeth? A Dentist’s Recommended Guide